
We love and adore our pets because they love us unconditionally. They look up to us to provide them a happy home – a comfortable and happy environment. What better way to care for your pooch than by making a tailor-made dog bed that they’ll cherish?
There’s something satisfying and unique about being creative and sewing things for the ones you love – perhaps it’s the personal touch and that special something that money just can’t buy. Or maybe it’s because you can customise the bed for durability, purposely sewing strong stitches and seams into the design and choosing a strong fabric for the casing. It can sometimes be difficult to find a comfortable and quality-made dog bed for larger dogs at the store, and if you’re lucky to find a good quality one it will cost you.
Also, if you have plenty of scrap fabric on hand that you don’t know what to do with, what better way to use it than for this project?
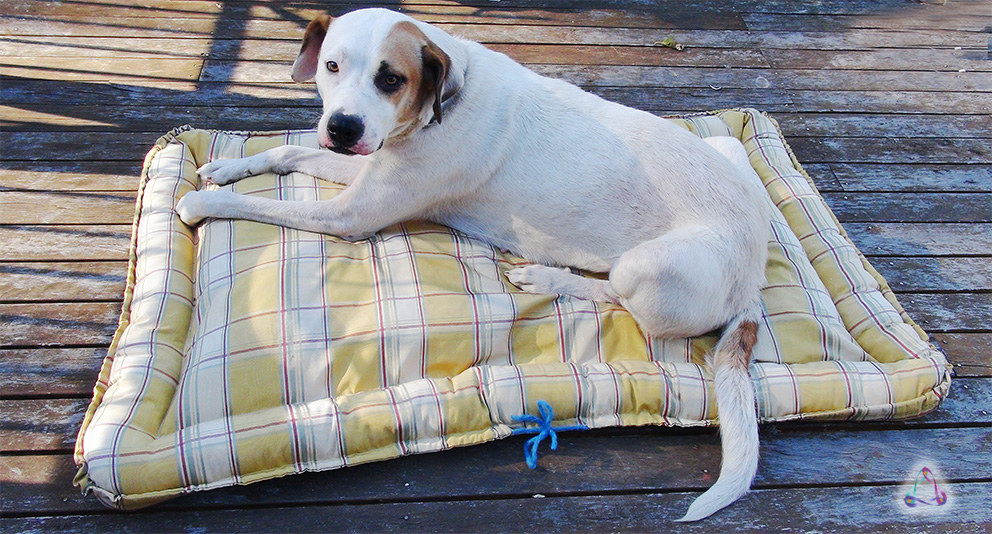
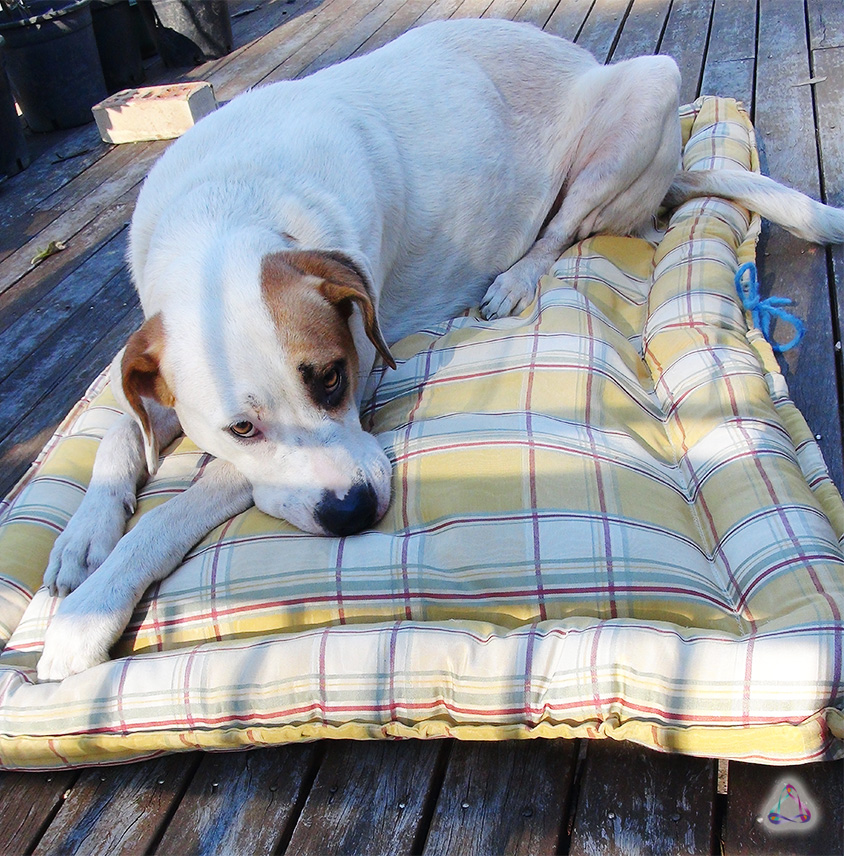
I decided to sew this bed for our lovely dog Stella, and she really seems to love it so far…
Do you have a large dog that needs a comfortable bed?
Do you have plenty of scrap fabric lying around?
Do you have fun sewing?
Then this DIY project will be perfect for you to tackle. It’s not hard to make, and won’t take too long to complete either. It took me a few days, but a lot of the time was spent on shredding my scrap fabric for the filling. You will need at least 4 bags of scrap fabric. If you do not have scrap fabric to fill the bed, you can easily substitute with polyester fibre fill or any other suitable filling for this project. You will need basic sewing skills; you will need to know how to use a sewing machine. You will also need basic sewing supplies as listed below.
Contents:
Step 1: Prepare your fabric
Step 2: Curving the edges
Step 3: Zipper placement and allowance
Step 4: Sew your zipper in place
Step 5: Sewing the edge
Step 6: Turning the fabric right side out
Step 7: Stitching the outer cord casing
Step 8: Stitching the outer filled pocket
Step 9: Insert your cord
Step 10: It’s time to fill your outer pocket
Step 11: Fill your inner pocket
Step 12: Final step – complete the stitching
What you’ll need:
* Basic sewing supplies (fabric scissors or rotary cutter and cutting mat, sewing machine, thread, washable fabric marker or chalk, tape measure, ruler, needle and thimble, etc.)
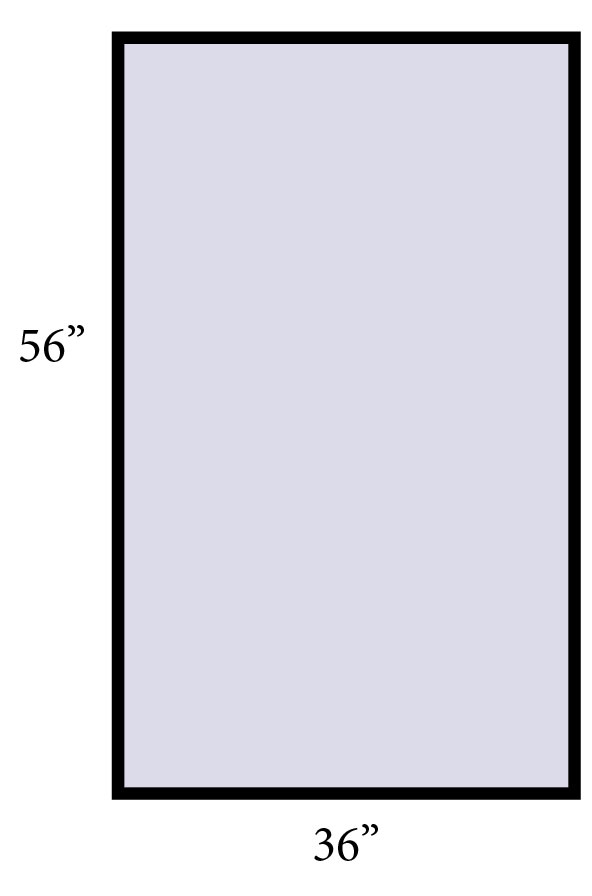
* 2 x pieces of fabric, each 56” L × 36” W in size (142 cm L × 91 cm W). 3m total fabric length is needed for this project.
* 3–4 bags full of scrap pieces of fabric or polyester fibre fill to fill the inner pocket
* Polyester fibre fill to fill outer pocket
* Zip (optional)
* Approx. 5m of cord or wool (optional)
So, let’s begin:
1. Prepare your fabric
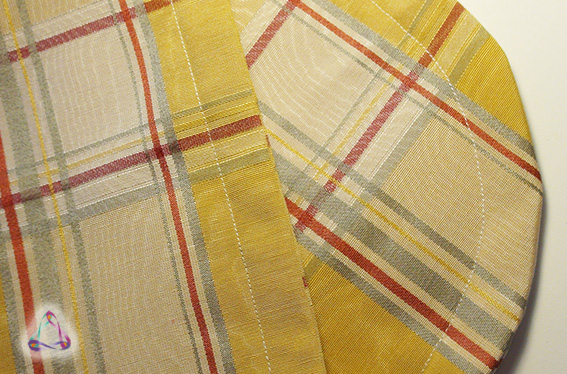
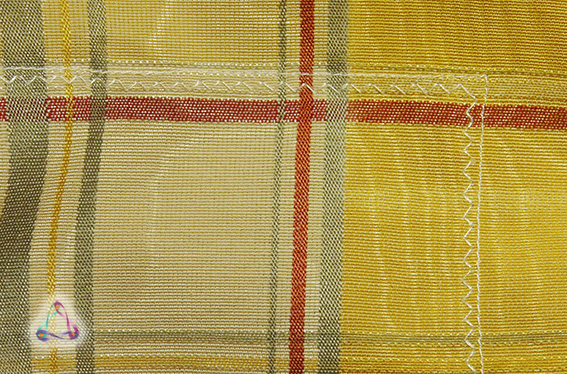
Start by cutting out two pieces of fabric that are 36” wide × 56” long (91cm × 142cm). Make sure the pieces are wrong side out. The right sides should be touching. The fabric I used is a strong and thick woven polyester material, but you can use any type of non-stretch durable fabric.
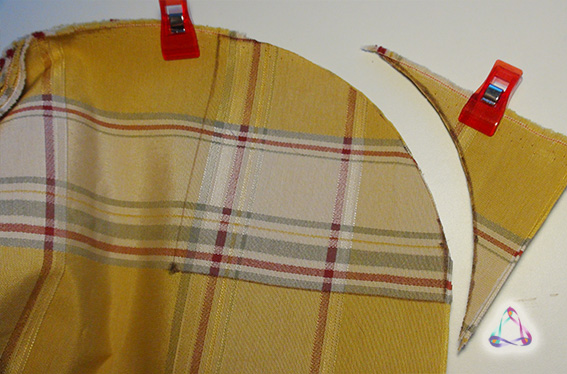
2. Curving the edges
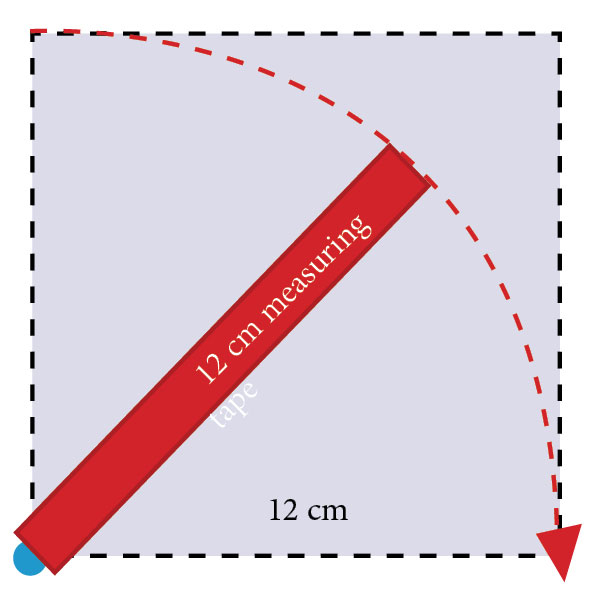
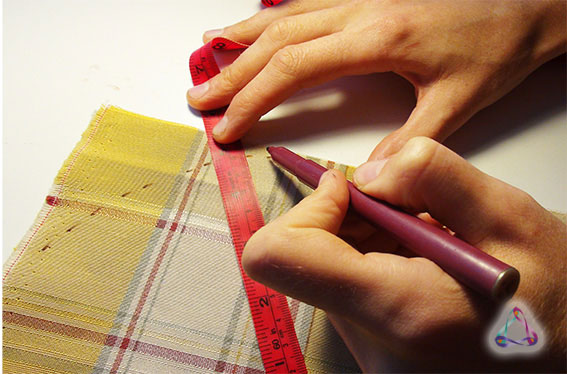
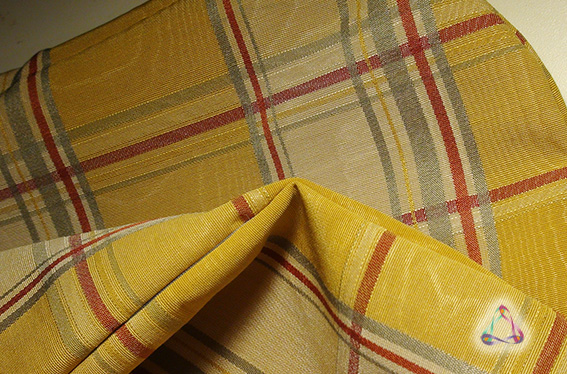
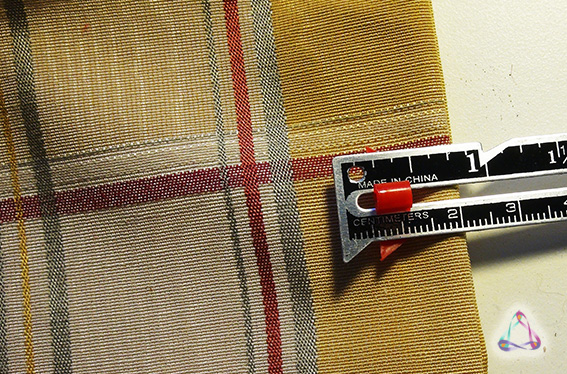
Rounding off the corners of your piece of fabric makes it look aesthetically pleasing but is optional. To mark your corner, you can use a stencil out of cardboard or by drawing directly on the fabric. To draw on fabric, begin by folding the fabric in half length ways. Measure two 12 cm squares from the outer edge corners.
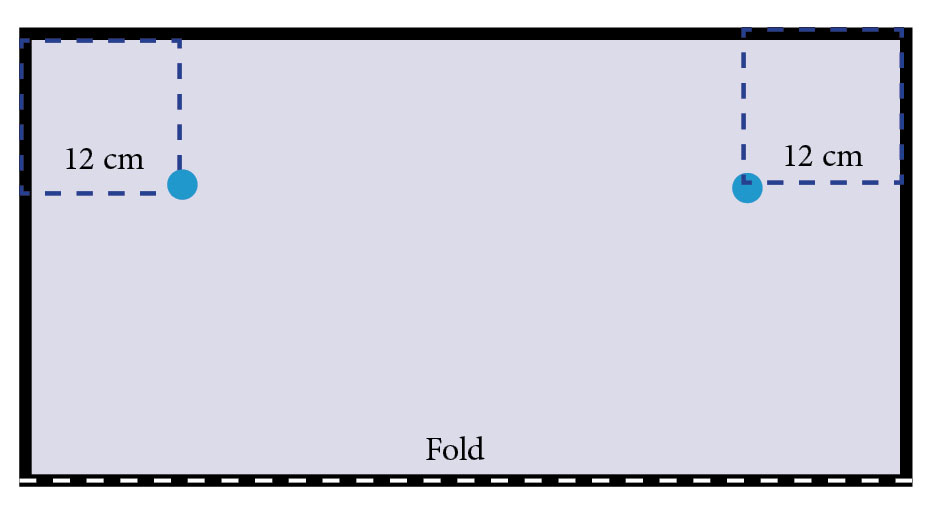
The blue dot in the diagram below is the pivot point, where you will use your measuring tape to measure a 12 cm circumference around the box, to create your circular shape. Note: if you want to create more rounded corners for your dog bed, make the squares and the length of the measuring tape larger than 12 cm, again using the pivot point as shown.
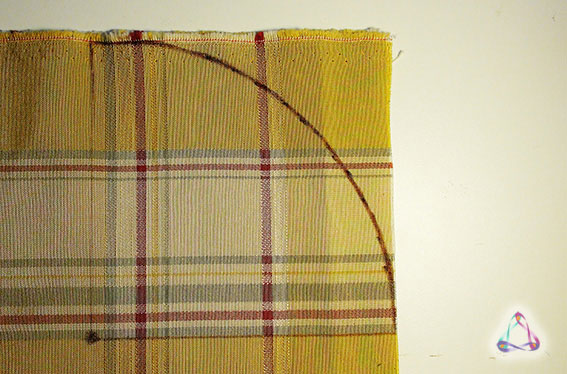
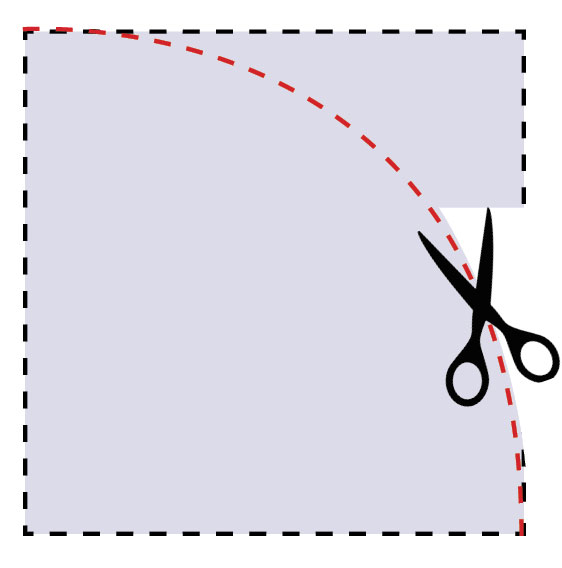
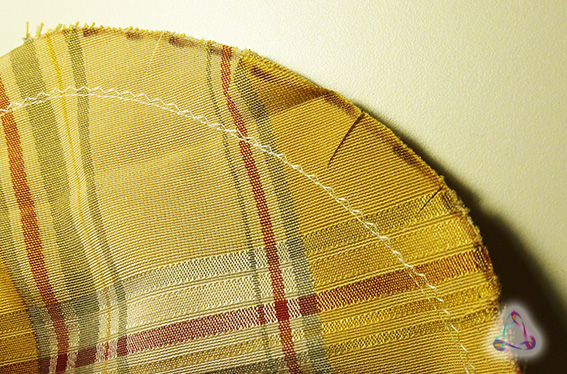
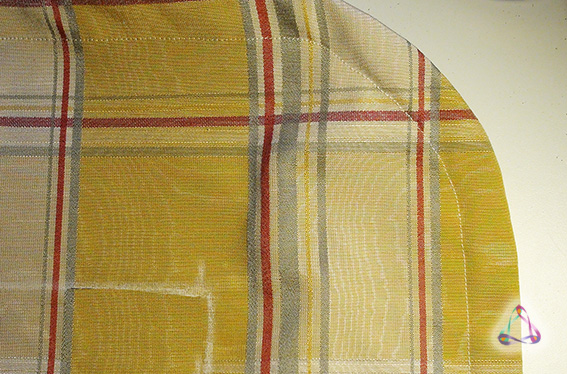
Now cut around the corner markings on both folds of the fabric with scissors or rotary cutter and a cutting mat. Because we folded the fabric, we should be cutting all four corners at once.
3. Zipper placement and allowance
Installing a zip is optional. I’ve included a zip in mine because I wanted the option to remove the fabric scrap filling before washing. Being able to remove the filling also allows the bed to easily fit into the washing machine.
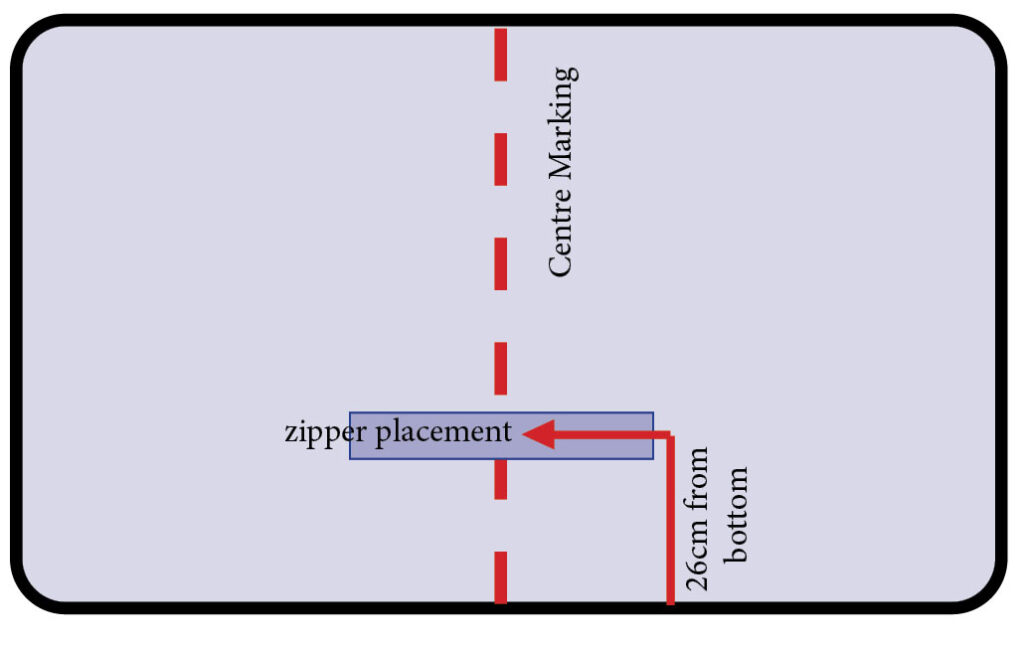
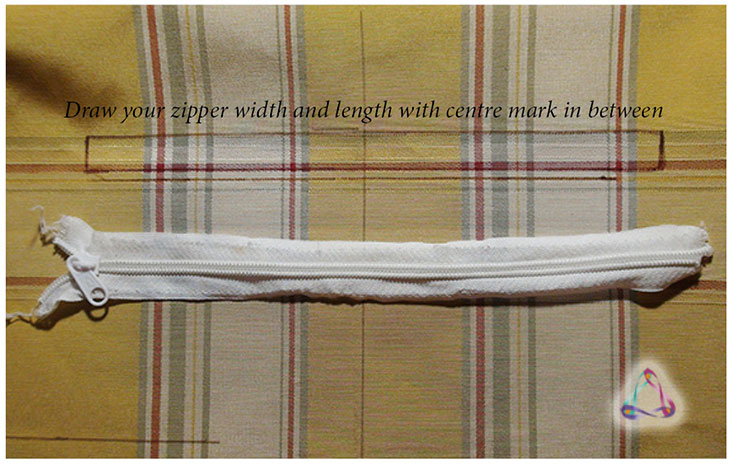
Keep the fabric together with pins or clips, then mark the centre of the fabric by folding two sides together and marking. Unfold, then by using this centre guide mark, draw a line all the way along the fabric.
Now, measure 26 cm from the fabric edge along this line and draw a line mark. This will be where your zip will be sewn (below).
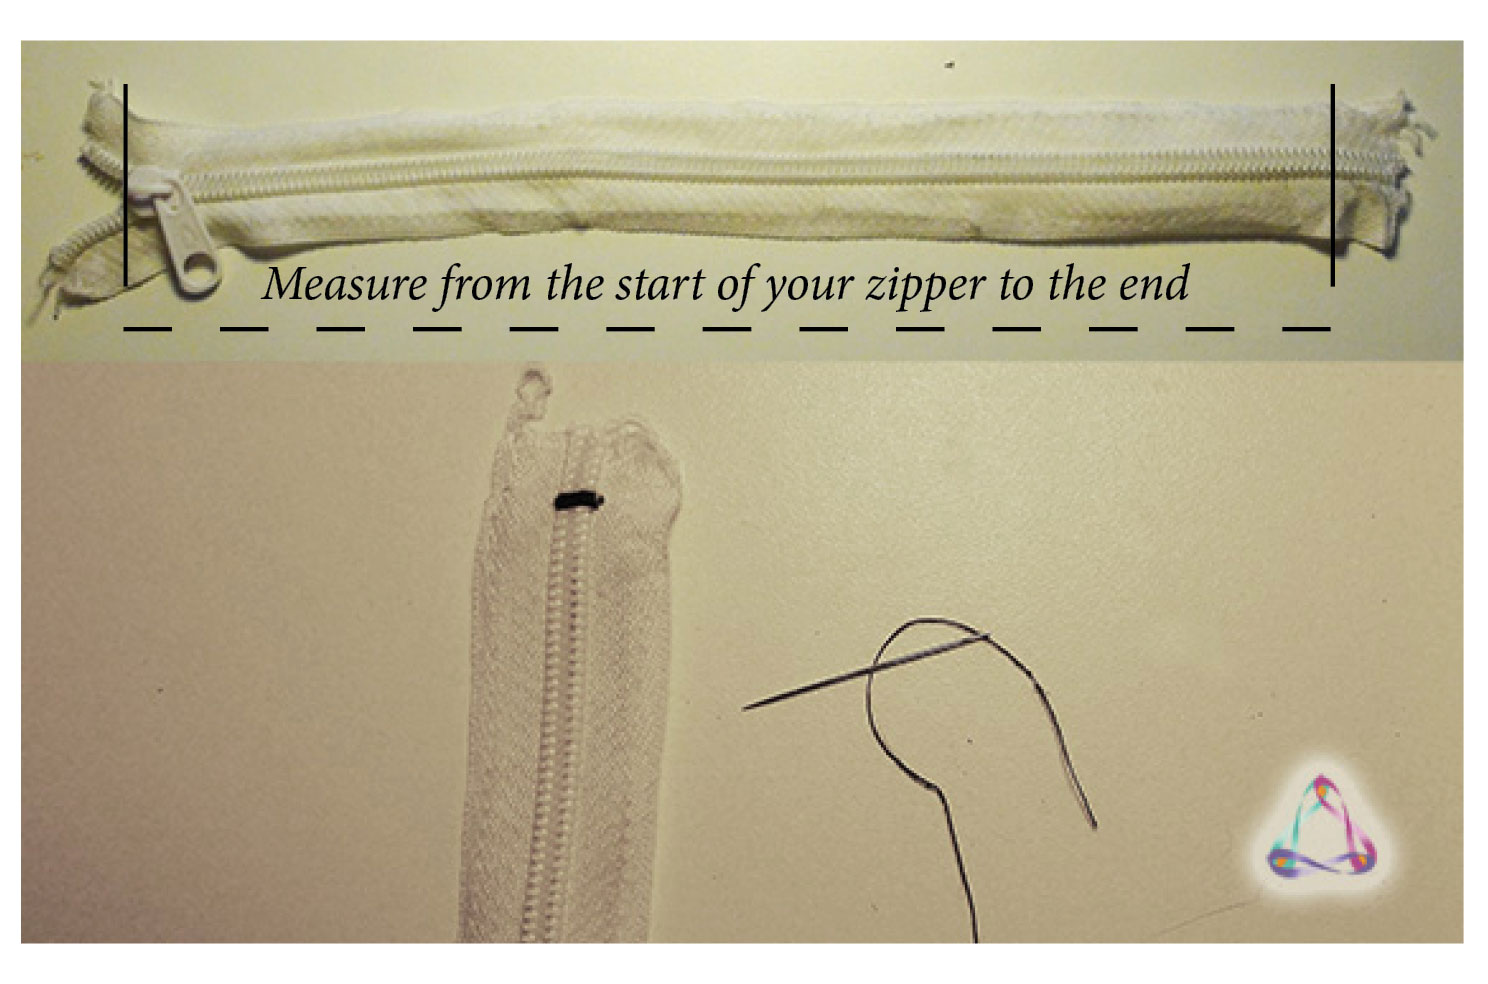
Measure your zipper. I recycled a zipper from a calico bag and sewed my own stopper on by hand. You could also use your zigzag stitch on your sewing machine for this job, if your zipper teeth aren’t too wide. Now measure your zipper from the top to the end stopper (below). This will be your zip length.
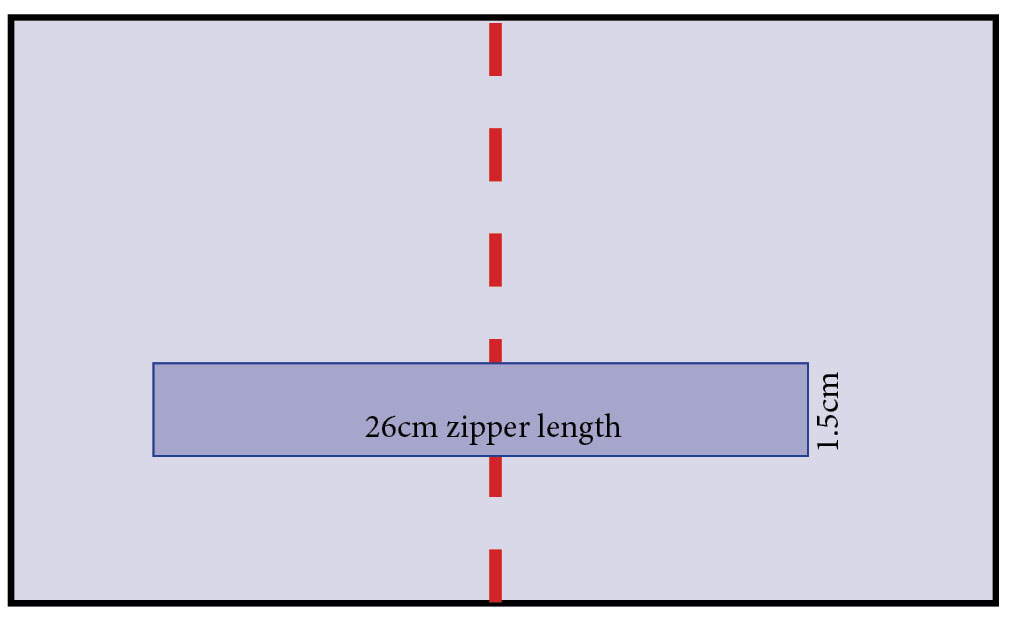
My zipper length measured 26 cm, so from my centre point on my fabric (marked – – –) I divided the length by 2, making it 13 cm on each side of the centre marking (below).

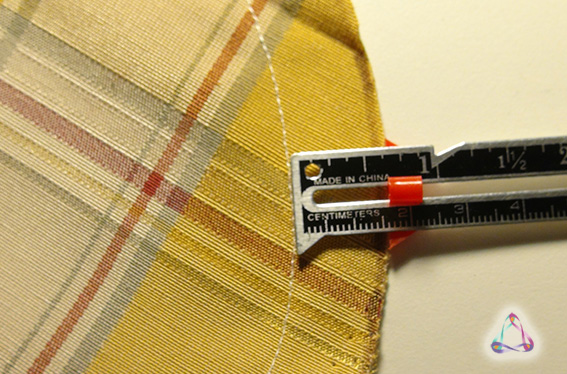
Now measure the width of your zipper. You can choose whether you want to show more or less of the tape surrounding the zipper. Mine was approx. 1.5 cm. Mark the width of your zipper onto your fabric where the zipper length marking is as shown below.
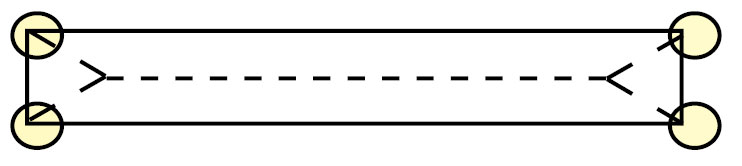
Next is to draw a centre line horizontally within the rectangle (marked – – – ), as shown below. Now mark a small dot about 1 cm in from each outer edge of the rectangle (marked with ⚫).

Draw a line from these black dots to each corner of the rectangle (marked – – – ).

Your finished zipper markings should look like this:

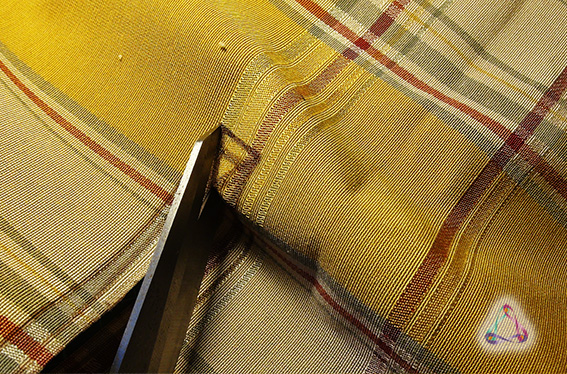
Very carefully, cut along the perforated markings shown below. Be careful when cutting the ‘triangles’; don’t cut any further into the fabric markings (shown with four yellow dots ).
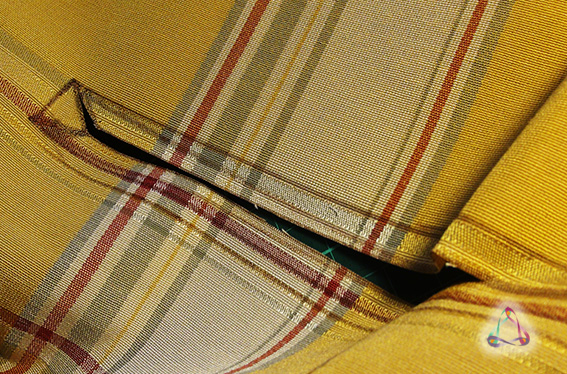
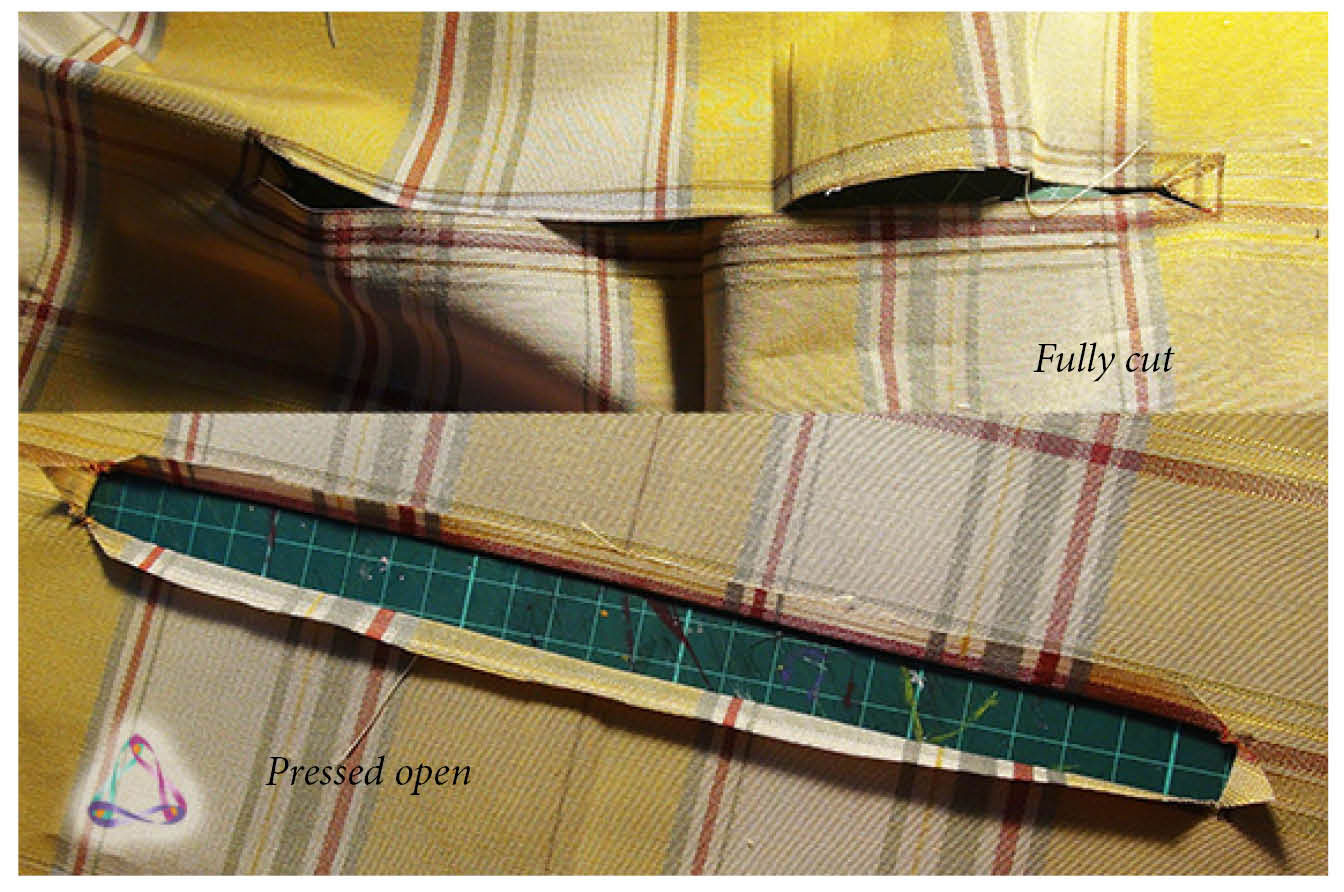
Your zipper is ready to be placed into position.
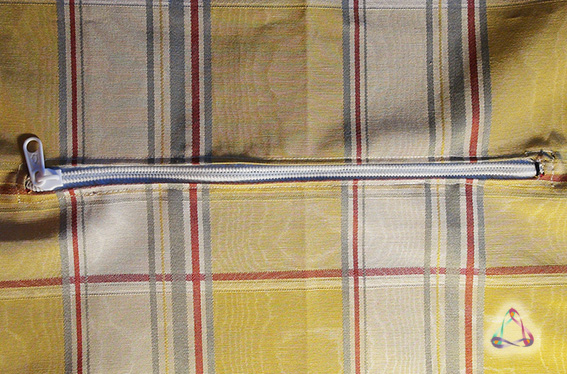
4. Sew your zipper in place
Position your zipper within the opening you created and now baste (large stitches sewn by hand) around the zipper tape like this:

Using your zipper foot on your sewing machine, sew as close to the edge of the fabric as possible. Sewing the corners can be a little fiddly, so take your time and use the machine’s manual handwheel around these areas.
When the zipper head gets in the way of your sewing path, place the needle into the fabric, lift the presser foot and move the zipper head out of the way by zipping the zipper open or shut. Like this:
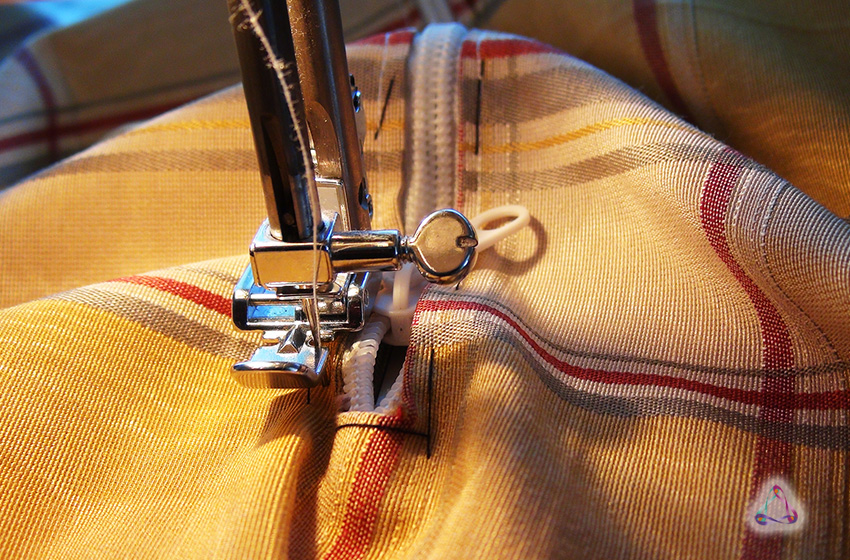
Placing the needle into the fabric and lifting the presser foot allows for the zipper head to be moved out of the way.
5. Sewing the edge
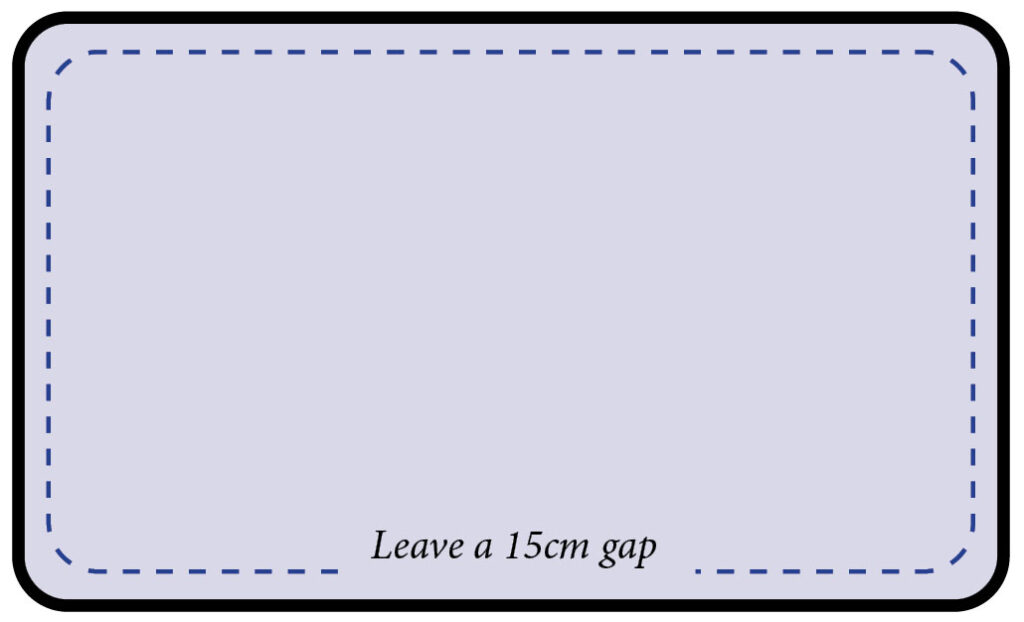
Now it’s time to sew the 5/8” (or 1.5 cm) seam allowance around the entire pet bed, except for a 15 cm gap which is needed to fill the outer pocket with poly fill. I used a shorter 2.5 mm stitch length to make the seam stronger. I then used a zig-zag stitch next to my initial seam for added durability, but this is optional.
When done, clip the corners to reduce bulk and help them come out crisp and smooth (below).
6. Turning the fabric right side out
Using the 15 cm gap we left, turn the entire fabric the right side out (below).

Now press the seam flat along the entire bed.
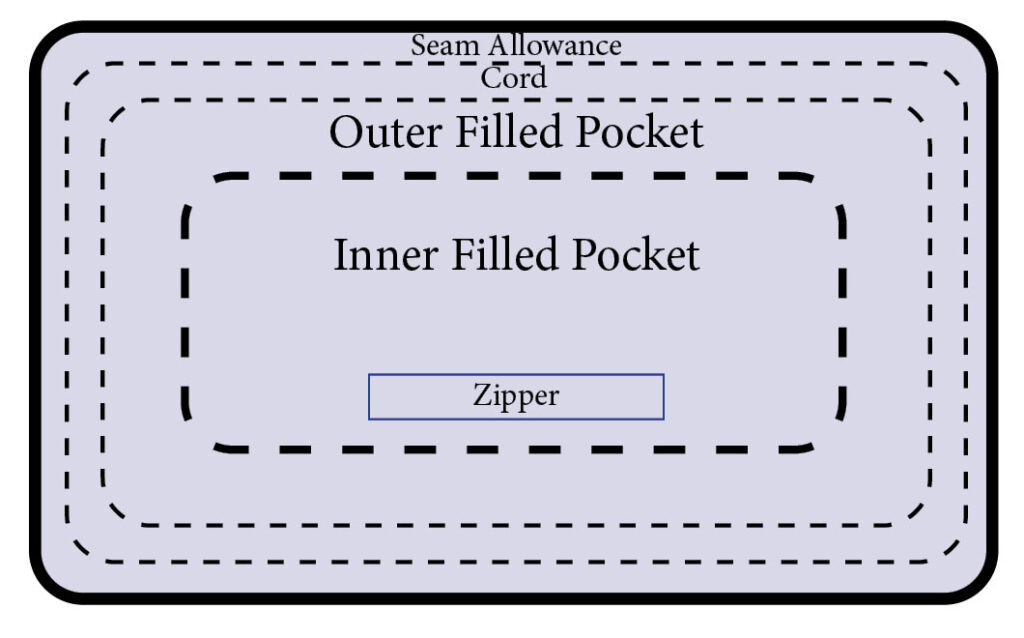
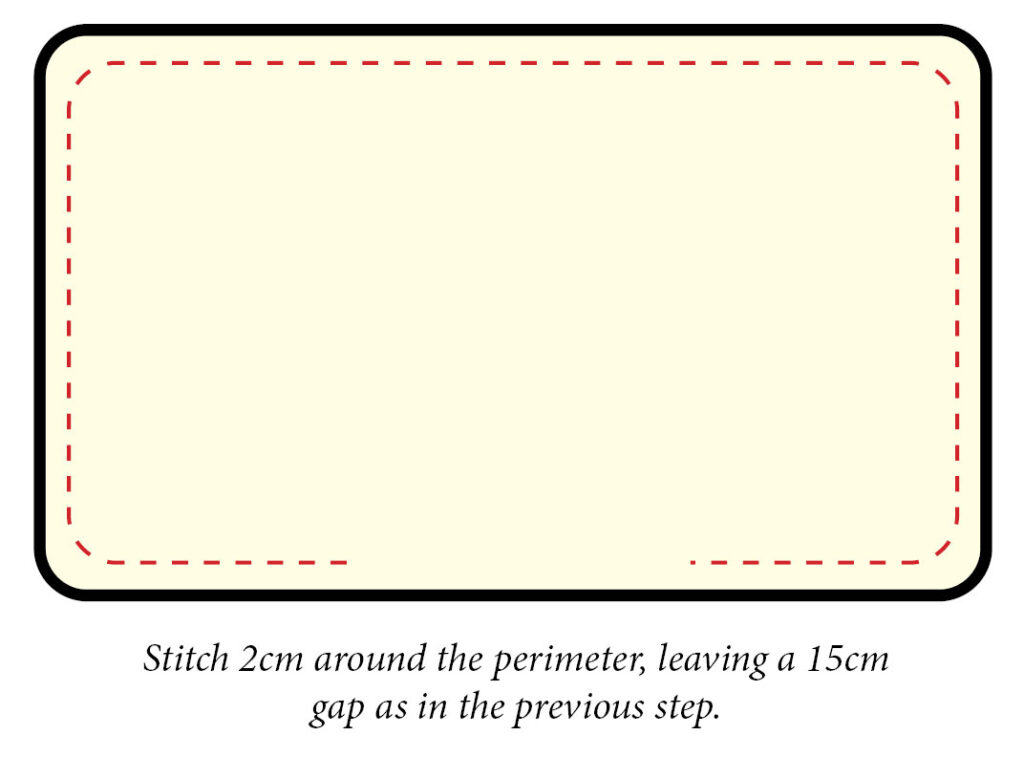
7. Stitching the outer cord casing
Stitch 2 cm from the new edge, leaving a 15 cm gap as in the previous step. This will form the outer shape for your bed and can also be used for the insertion of a cord. I used the seam allowance guide on my machine and eyeballed it to stitch evenly all the way around, using a 2.5 mm stitch length. You could mark the corners with chalk to help guide you to stitch parallel to the curve.
8. Stitching the outer filled pocket
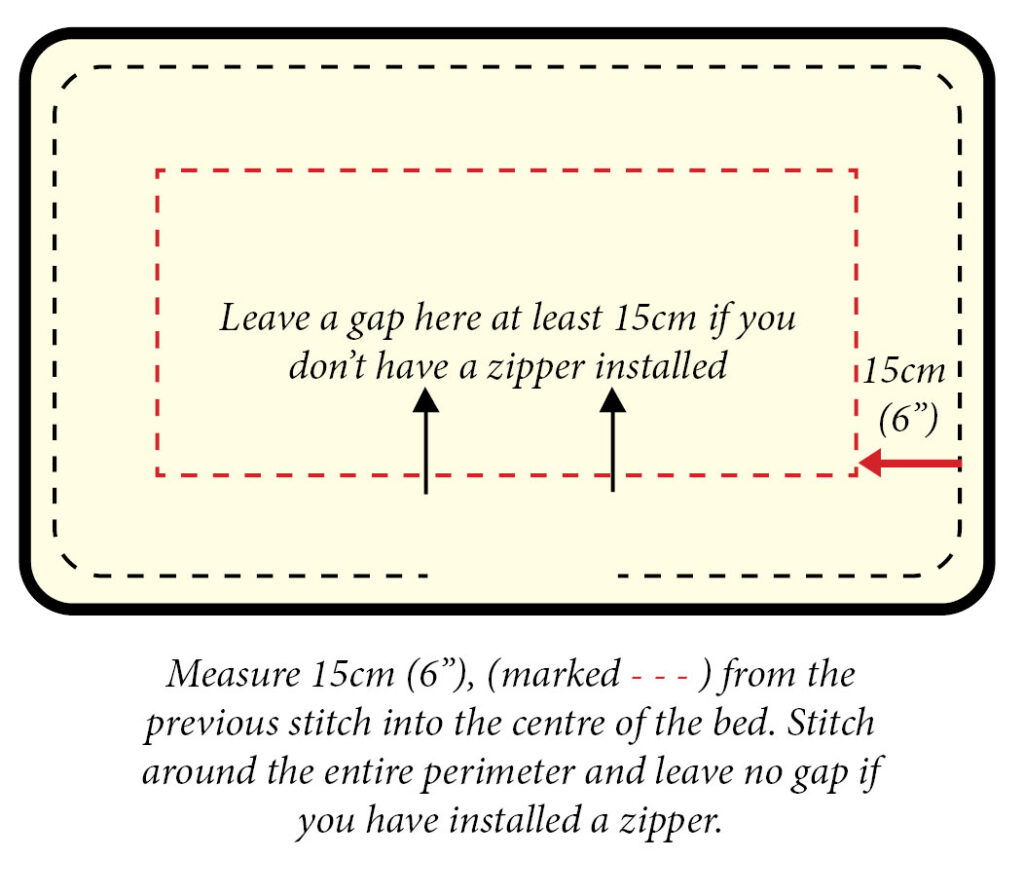
Marking 15 cm or 6 inches from the cord casing stitch, draw a rectangle with chalk or washable marker around the entire bed (marked – – – ). There is no need to leave a gap in the stitching if you have installed a zipper, just stitch all the way along the perimeter if this is the case. Otherwise, do leave a 15 cm opening to allow for filling. (For my bed, I used 5 inches and found the outer filled pocket was slightly too narrow and hard to fill, so I adjusted the measurements here to 6 inches.)
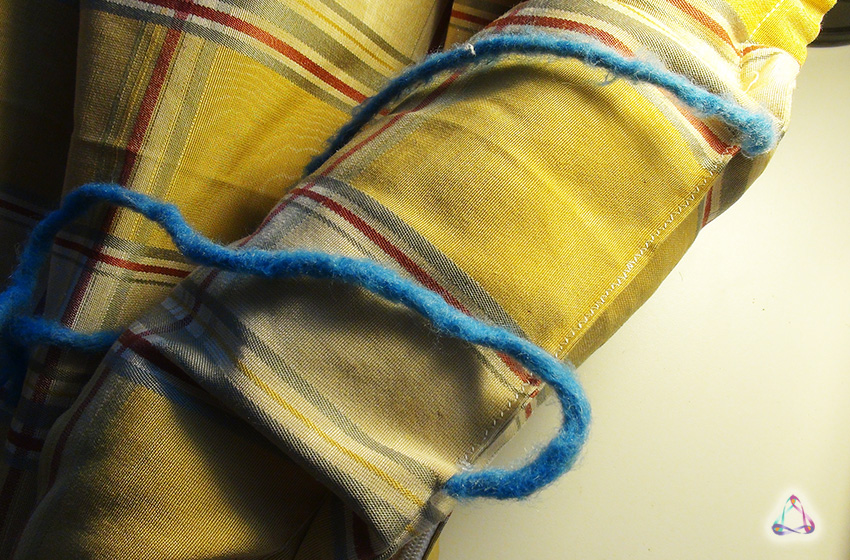
9. Insert your cord
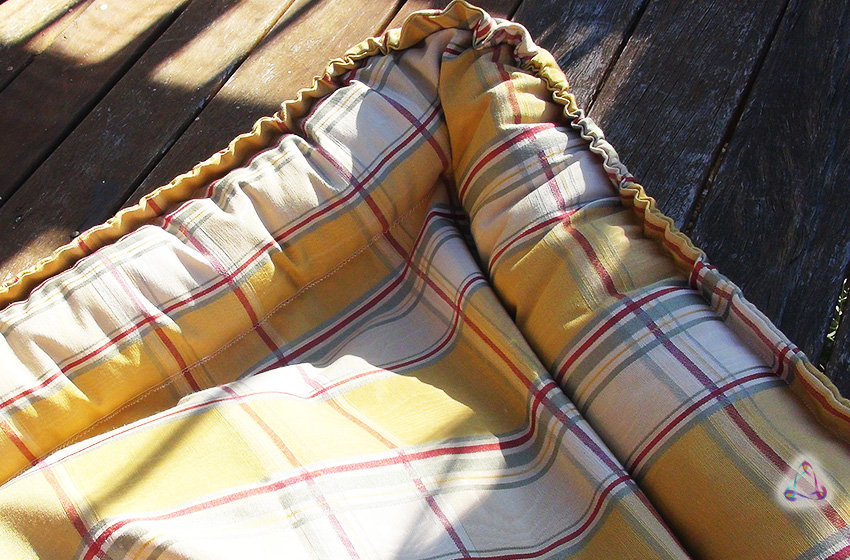
Now is a good time to insert your cord into your outer edge cord casing. (It will be trickier to insert it after you add the filling, like I did.) Of course, this step is optional as the cord is purely decorative. It gives a ruffled look to the edge as it pulls on the fabric when you tie the cord at either end. I think the dog bed still looks good without one. Attach your cord to your large pin and guide it through the narrow casing until all the cord is inserted around the entire perimeter. Then remove your pin and you’re done!
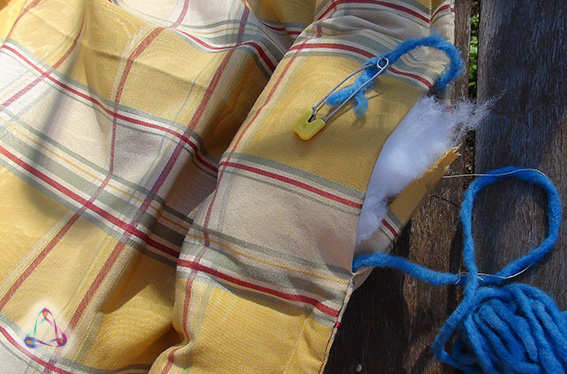
10. It’s time to fill your outer pocket
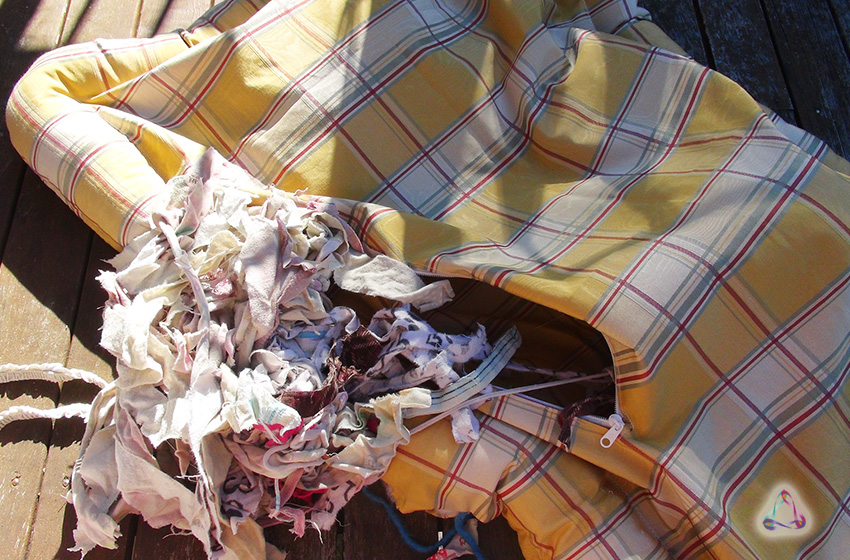
Using your polyester fibre fill (or other fill of your choosing), fill in the outer pocket. If you haven’t installed a zipper, leave the area unfilled where you have left a gap. I got the kids involved and they had some fun!
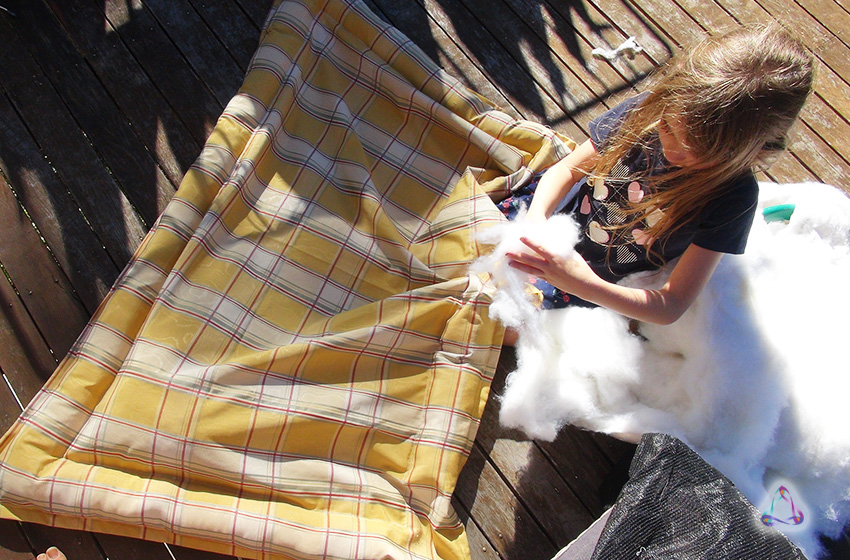
11. Fill your inner pocket
If you have installed a zip, fill up the inner pocket with your scrap fabric or poly fill through this opening. If not, use the 15 cm gap you left when you stitched the outer pocket on the other side.
12. Final step – complete the stitching
If you have installed a zipper, all you need to do to finish is to stitch the remaining gaps closed, either by hand or with the sewing machine if it’s not too difficult.
If you haven’t installed a zipper, you should be able to get your bed into your sewing machine to finish the inner pocket stitch closed. If you find this too difficult, you can hand stitch it closed. Once you have completed the inner pocket, complete the filling of the outer pocket around the cord area and stitch it closed.

Notes:
You can experiment with different sizes if you have a smaller dog. You can reduce the overall size of the fabric, just make sure that the cord edging allowance is wide enough to fit a large pin through if you plan to insert a cord. Also ensure that the outer pocket is at least 6” in width, so you can get your hand through when filling.
That’s it! I hope I have inspired you to tackle this project for yourself. If you have found this useful, leave a comment below. Happy sewing.
Thank you for your easy to follow directions. I had not thought of adding a zipper, now I will.
Hi Brenda, glad you found it helpful. Thanks for your comment.
Was looking for some more hints & found this. Thanks. I make dog beds for shelter dogs for there kennels and for transporting them to fosters, etc. I use old tshirts, and get blankets off local auctions too. Thanks again ????
Great I’m happy to hear you found it useful for your shelter dogs. It’s cool you can reuse old fabric, and when you sew it yourself you can make the seams so much stronger than the ones you buy in-store. Regards Helen.